Friday, December 2, 2016

Hair Flower bouquet

~The flower bouquet~

*Somehow some of my post have been...not deleted, but not live either so these are kind of way out of sequence but I wanted to get them back up. I will have one day of retro styles, I guess you could say, being reposted but if you want to see our newest, go to our Sweet Sixteen post....I told you this was retro lol. She is now 16!

This is the style I came up with for The Arizona Aloha Festival that we went to. It is three flower's and stems going down the back.


This starts with three ponytails across the top then you take and split the first one into four pieces on each side but leaving the middle kind of like peeling a banana. Then you take the top "peel" and fold it over (going away from the middle) to make the petal. Secure it with a small elastic. There will be some hair hanging down from the petal, take and split that in half and bring each piece down so there is one on each side. Then start with the next petal. Doing the same thing all the way around. When you have done all four take all the remaining hair from the petals together and secure it with a green elastic and place a few more down the line depending on how long your daughter's hair is. Then take the middle part (the banana) and twist it into a real twisty bun and secure it. Then just repeat with the other 2 ponies and and join each "stem" together and now you have the bouquet!
P.S.
I will be doing a more elaborate version of this soon so just keep a look out!


Here is a couple closer side view.


At the Aloha Festival

Ƹ̵̡Ӝ̵̨̄Ʒ Dutch Braid Pull Throughs Ƹ̵̡Ӝ̵̨̄Ʒ

Dutch Braid Pull Throughs

*Somehow some of my post have been...not deleted, but not live either so these are kind of way out of sequence but I wanted to get them back up. I will have one day of retro styles, I guess you could say, being reposted but if you want to see our newest, go to our Sweet Sixteen post....I told you this was retro lol. She is now 16!

This is one of my favs. I used it to shorten the look of Chelina's piggies :) It is really cute and keeps the hair from getting all tangled. You can get the short hair look without having to cut her hair. So I found these pics from way before I ever heard of a Hair Blog much less thought of doing one. So here it is with my cute little princess the day before her 5th B-Day.


So all you do is make dutch braids starting in the front and going all the way down to almost the bottom. Then pull one side up to the opposite side and pull it through the bottom of the dutch braid so it is coming out the top then put a cute elastic on each one. and curl the hair under. You can make it shorter also, it just depends on how far down you continue the braids down.
Enjoy and if you have questions, ask away :)

Flippy Flower

Fippy Flowers

*Somehow some of my post have been...not deleted, but not live either so these are kind of way out of sequence but I wanted to get them back up. I will have one day of retro styles, I guess you could say, being reposted but if you want to see our newest, go to our Sweet Sixteen post....I told you this was retro lol. She is now 16!

Ok this is a very simple style I did kind of by accident with a very pretty adjustable headband from Every Little Detail. She has all kinds of beautiful hair accesories! We love the Fun & Funky Flowers:).I was trying to figure out what to do with her hair after she had twist in and this just kind of formed. I didn't do a step by step but all it is, is a Double Twisted Bun with the flippy end that is kinda wavy (you could crimp it) twist one side around more then the other which makes the flower look. Separate the flippy part so it fans out. Spray and your done. I just added the pretty pink headband and a white flower and I was done :)

Silly Face lol


Quick and Easy Cheer Do

Quick and Easy Cheer Do
*Somehow some of my post have been...not deleted, but not live either so these are kind of way out of sequence but I wanted to get them back up. I will have one day of retro styles, I guess you could say, being reposted but if you want to see our newest, go to our Sweet Sixteen post....I told you this was retro lol. She is now 16!

This is a very easy style to do and is great for cheer or dance (or whenever lol). We did this one because, well it was a long day and I wanted to do something cute and easy.
I have been using this neat little hair thingy for about 2 1/2 years and is great for those days you wanna just put your hair up and still look cute. This happens to be my favorite hair accessory for me :) I got it at Clair's at the mall. I think it is made by Goody but I don't remember.
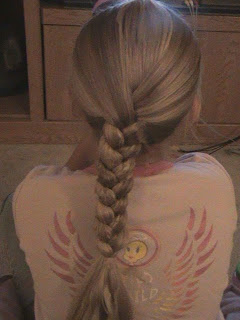
Ok so first just do a braid, leaving some of the hair at the bottom un-braided.
Then slide the clip in.
Pull the braid up so the elastic is about to the top of the clip.
Pull the elastic part of the clip over the braid like so.
Put hair down that wasn't braided and back brush and add some hair spray and just kind of fluff :). That is it!


You can also add a cute little flower or bow like this one from Every Little Detail.

Thanks for reading and we hope you like this do :).
Keep an eye out for the Fabulous 4th of July Do I will be doing soon :)

Fun Flippy Double Twist Buns

Fun Flippy Double Twist Buns Repost

*Somehow some of my post had been...not deleted but not live either so these are kind of way out of sequence but I wanted to get them back up. I will have one day of retro styles being reposted but if you want to see our newest, go to Sweet Sixteen post...I told you this was retro lol. She is now 16!

This is a pretty easy style and I think it comes out looking very cute! What I did was put some gel through out the hair and then make a single pony for the top part of the hair. Don't start by the ears though, start closer to about eye level if that makes sense. Secure with an elastic.
Now separate a small section of hair below the ear and make a small pony using a clear elastic and then to a twist braid or regular braid. We did the twist because it looks nice when you twist both sides together. Do this for both sides secure the bottom with a clear elastic.
Now separate the remaining hair into 2 ponies. Do Double Twist Buns as in my other post, leaving the little flippy part at the top. Do all 3 ponies and make sure to secure them with about 2 of those clear elastics so they don't break.
Pull the side twisted braids up and twist together and secure the ends with a bobby pin, clip,or ribbon or you can even take a small piece of sewing thread and tie around the twist.
Curl the top pony so it falls on each side and curl the other two just under and back brush a little to add a little extra poof, spray good and your done!


Ok I think I am gonna start taking donations for a better camera lol :) I know they are awful and dark but I hope they help.


Tuesday, November 29, 2016

Sweet Sixteen Fun


It's hard to believe that I started this blog about 9 years ago! My baby was only 7 year's old and starting the first grade. Now she is 16 and in the 10th grade. Time goes by so fast and one day you wake up and that beautiful little baby you carried for 9 months and brought home from the hospital is now just a few short years from being a grown up.
Since Chelina was a baby, I knew I wanted to give her a special Sweet Sixteen. By the time she was 2 almost 3 I found myself a single mom and with nothing. I grew up poor and I wanted nothing more than to give my daughter some of the special experiences I never had. Some thing's are just important for a girl.

Unfortunately, I wasn't able to do what I wanted to do for her Sweet Sixteen which was either a big party or even more so, her first real vacation and first trip to a Disney Park which has been her dream for as long as I can remember. Even with attempts at fundraising with T-shirt designs by me, it was a no go. I am still offering the T-shirts so maybe I can still pull off the trip even though it isn't on her birthday. If you would like to check them out you can go here Destination Bliss

I did however try to make it as special as I could. I was able to get her a special dress (not new of course but gorgeous), we had a photo shoot, and then we went to Rainforest Cafe for her Birthday Dinner with family. It was nice and she got to feel like a princess a little. One of the things she want's to do is work at Disney as one of the Princess' because she love's to make little kid's happy.

Since some of you have been a part of our little blog for year's I wanted to share the picture's from her birthday with all of you :-)!


These are Chelina's Special Birthday Pancakes! It's a tradition we have had since she was about 2 years old! This year they were a little extra special though :-).


This was after her hair and makeup before we did the photo shoot.


We found a pretty location to do the photo shoot. Some where at Freestone Park in Gilbert, Az and these were taken at a beautiful area in Chandler. It is actually a neighborhood  called Fulton Ranch. It's a beautiful area!


I love this picture of her walking away in her high heels and her tennis shoes are behind. It symbolizes the growth from childhood to young adult. Although, those were her cheer shoes and she isn't walking away from that anytime soon lol.


This is the entrance to Arizona Mill's Mall where Rainforest Cafe is.


They used to have huge aquariums with all kinds of  fish but they got rid of the fish for some reason.


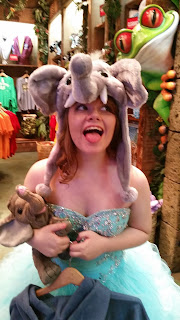
My goofball lol. She loves elephants!


Chillin with the Froggy lol.

Well I hope you liked sharing in her special day. 

I will be posting more pictures of hairstyles soon. You can also follow us on Instagram at girls_curls_hair :-)


Friday, August 26, 2016

~*Braided Pull Throughs*~

~*Braided Pull Throughs*~
I got these ADORABLE flower clips and a headband from Every Little Detail yesterday and couldn't wait to use them. I decided to use the Pink and Sparkly Green flower first. There is still a sale going on so get over there before its over! You don't wanna miss out on 20% off, just type in SpringFever20 in check out.


Okay, to do this just seperate the front hair into 3 sections, the top and the sides. Then braid the sides and split the top one into 2 and braid each one. Pull the rest of the hair into a low ponytail and make a lot of braids out of the ponytail hair leaving some of the ends unbraided.


Pull the ends of the ponytail braids under and through making sure it comes through the very middle top of the ponytail and then twist the seperate braids around the ponytail and secure with an elastic on top.
So now you have the 2 layers of hair, hold it straight up and back brush it and curls under a little. Then add your bow or flower like the one I got from Every Little Detail and your set! Here is the finished do'


Once again-sorry about the crappy dark pictures. I will hopefully be getting a new camera soon :)
Thank you very much, Jessica!


Wednesday, February 24, 2016

Upcoming Renaissance Festival!


So it is that time of year again! The Ren Fest has started and my daughter and I are going next month. So I am going to try to get some new Renaissance Hairstyles up before then.


We have been going to the Arizona Renaissance Faire since Chelina was in Kindergarten. It's always fun to spend the day there. So much artistry and creativity to enjoy! It always give's me a lot of  inspiration for hair styles.


Besides, it's nice to take a break from the present reality and take a step back in time. Can't always take life too seriously lol.

So check back with us to see the pic's. I know I have been slow moving on my return but I recently started a Instagram account for the blog to give me more motivation lol. All the talented Hair Artist give me motivation and inspiration to get my tail in gear!

If you would like to follow us
IG: girls_curls_hair